ESP8266 MP3
来自Jack's Lab
(版本间的差异)
(→使用 DAC) |
(→Quick Start) |
||
| 第20行: | 第20行: | ||
</source> | </source> | ||
| − | + | 打开 app/user/playerconfig.h 修改 AP_NAME 和 AP_PASSWORD 为你所用之无线路由 AP,然后编译、刷机: | |
<source lang=bash> | <source lang=bash> | ||
$ cd ../sketch/mp3 | $ cd ../sketch/mp3 | ||
| + | $ vim app/user/playerconfig.h | ||
$ make flash | $ make flash | ||
</source> | </source> | ||
| 第40行: | 第41行: | ||
* [[Getting Started with Noduino SDK on Mac OS X]] | * [[Getting Started with Noduino SDK on Mac OS X]] | ||
* [[Getting Started with Noduino SDK on Windows]] | * [[Getting Started with Noduino SDK on Windows]] | ||
| + | |||
| + | |||
| + | 串口刷机完成后,系统会去访问 http://noduino.org/fair.mp3 这个文件,然后播放 | ||
| + | |||
| + | 找一个的小喇叭...... | ||
<br><br> | <br><br> | ||
2015年12月28日 (一) 00:13的版本
1 Quick Start
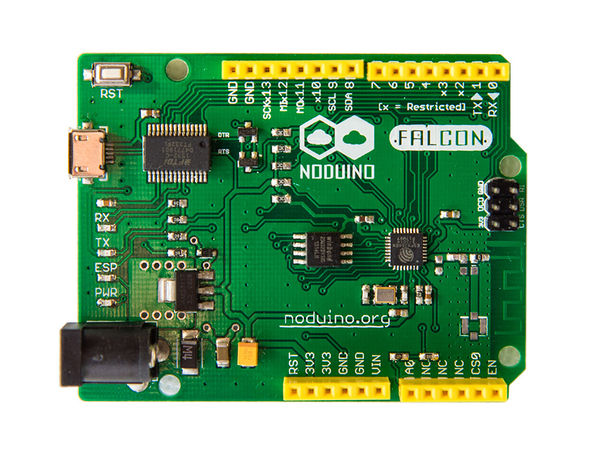
准备一块 Noduino Falcon 开发板,一根 micro USB 连接线:
获取 noduino-sdk:
$ git clone --recursive git://github.com/icamgo/noduino-sdk.git noduino-sdk
生成 toolchain (you need Python 2.7):
$ cd noduino-sdk/toolchain
$ ./gen.py
打开 app/user/playerconfig.h 修改 AP_NAME 和 AP_PASSWORD 为你所用之无线路由 AP,然后编译、刷机:
$ cd ../sketch/mp3
$ vim app/user/playerconfig.h
$ make flash
不同平台下,你的串口设备号可能不一样,确认一下你的串口设备,比如在 Windows 下 Falcon 开发板可能被识别为 COM7(设备管理器里查看),则:
$ make flash ESPPORT=COM7
各平台下,Noduino SDK 使用,更多参考:
- Getting Started with Noduino SDK on Linux
- Getting Started with Noduino SDK on Mac OS X
- Getting Started with Noduino SDK on Windows
串口刷机完成后,系统会去访问 http://noduino.org/fair.mp3 这个文件,然后播放
找一个的小喇叭......
2 使用 DAC
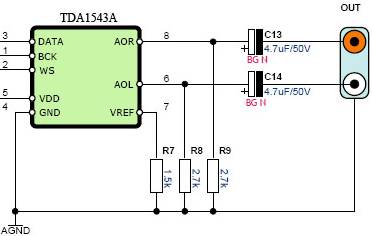
用一片 I2S 接口的 DAC:
可改善软件解码的不如人意
接线:
- I2S_BCK --- GPIO15 --- Noduino_Falcon D3
- I2S_WS --- GPIO2 --- Noduino_Falcon D2
- I2S_DATA --- GPIO3 --- Noduino_Falcon D0

