Noduino OpenLight EN
(→Overview) |
(→Quick Start) |
||
| (未显示1个用户的1个中间版本) | |||
| 第23行: | 第23行: | ||
* Power on, waiting 8s to light | * Power on, waiting 8s to light | ||
| − | * Light is flashing slowly in red means waiting for network | + | * Light is flashing slowly in red means waiting for network connection |
| − | * If the light is not flashing in red, please turn on and off 3 times, (eg. turn on - light on - turn off, 3 times) the light will be in red gradient for network | + | * If the light is not flashing in red, please turn on and off 3 times, (eg. turn on - light on - turn off, 3 times) the light will be in red gradient for network connection |
* Connect mobile to Wifi then scan QR code in WeChat to click “Network Connection” | * Connect mobile to Wifi then scan QR code in WeChat to click “Network Connection” | ||
| − | * Enter WiFi password, click "Connect" then waiting for network | + | * Enter WiFi password, click "Connect" then waiting for network connecting complete. (P.S. only 2.4G WiFi is applicable, 5G WiFi and WiFi enterprise-level security certifications are not applicable) |
| − | * Complete WiFi configuration, WeChat will be in LAN devices | + | * Complete WiFi configuration, WeChat will be in LAN devices discovery mode. Available devices list will be visible. |
| − | * Click the first device then press "Link Device" button to bind the device. (P.S. if the device has been binding, then the button at bottom is "Enter Official Account" | + | * Click the first device then press "Link Device" button to bind the device. (P.S. if the device has been binding, then the button at bottom is "Enter Official Account") |
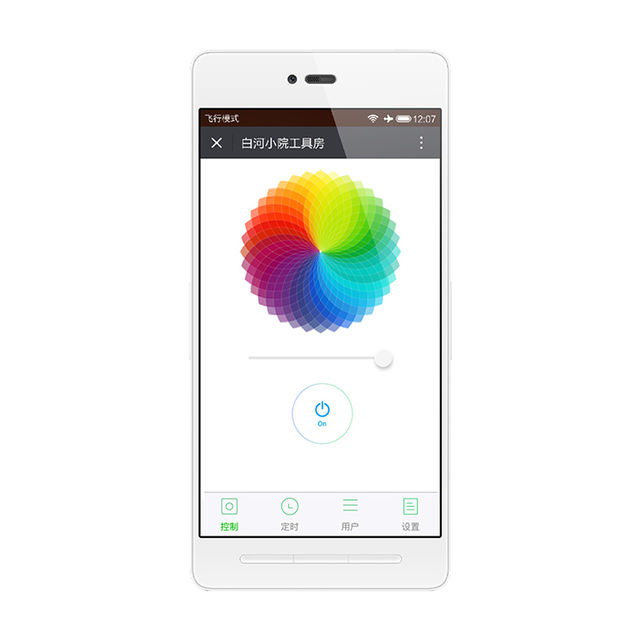
* Finish above steps, please press "Enter Official Account" button then click "My Device" button to find your binding devices list. Click the device to enter control page. | * Finish above steps, please press "Enter Official Account" button then click "My Device" button to find your binding devices list. Click the device to enter control page. | ||
2016年10月25日 (二) 16:38的最后版本
目录 |
[编辑] 1 Overview
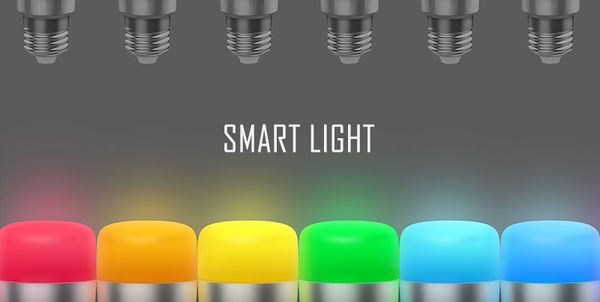
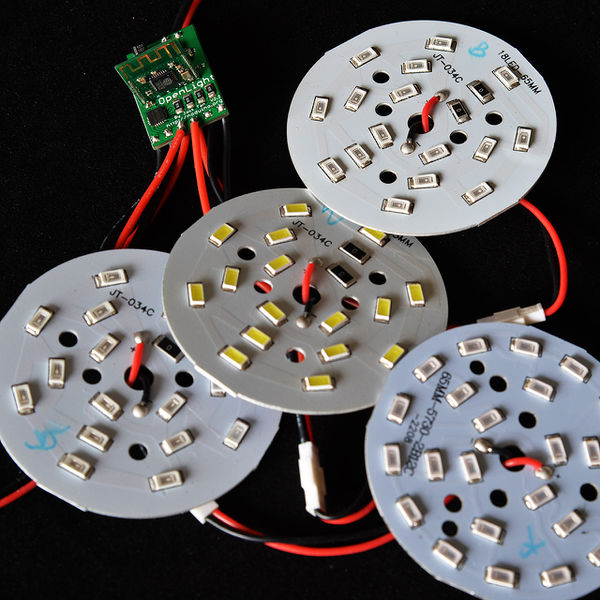
OpenLight Bulb:
OpenLight Controller:
[编辑] 2 Quick Start
- Power on, waiting 8s to light
- Light is flashing slowly in red means waiting for network connection
- If the light is not flashing in red, please turn on and off 3 times, (eg. turn on - light on - turn off, 3 times) the light will be in red gradient for network connection
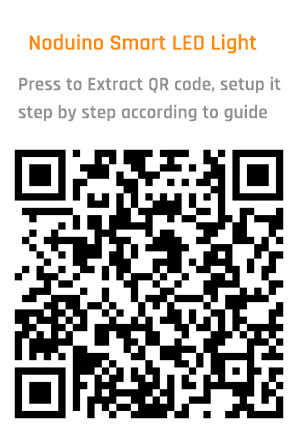
- Connect mobile to Wifi then scan QR code in WeChat to click “Network Connection”
- Enter WiFi password, click "Connect" then waiting for network connecting complete. (P.S. only 2.4G WiFi is applicable, 5G WiFi and WiFi enterprise-level security certifications are not applicable)
- Complete WiFi configuration, WeChat will be in LAN devices discovery mode. Available devices list will be visible.
- Click the first device then press "Link Device" button to bind the device. (P.S. if the device has been binding, then the button at bottom is "Enter Official Account")
- Finish above steps, please press "Enter Official Account" button then click "My Device" button to find your binding devices list. Click the device to enter control page.
- Note:
- If more people need to control the device, please connect to the same router and scan the same QR code while the device is power on. Click "Device connected and skip" -> "Link Device"->"Enter Official Account" to control smart devices
- To connect the device to another router in same network, please turn on and off the light 3 times and scan the QR code in Wechat to connect the network, binding is not necessary.
- To transfer the device to different place(networks), the light will be in red gradient waiting for networks matching. To connect networks please just scan QR code in WeChat.
- Turn on and off the light 6 times to restore the factory settings
[编辑] 3 API
[编辑] 4 Firmware
[编辑] 4.1 Compile
Getting noduino-sdk:
$ git clone --recursive git://github.com/icamgo/noduino-sdk.git noduino-sdk
Generate toolchain (you need Python 2.7):
$ cd noduino-sdk/toolchain
$ ./gen.py
Compile:
$ cd ../sketch/open-light
$ make
The generated firmware is located in build/ dir named user1.bin annnd user2.bin
Window environment please refer to Getting Started with Noduino SDK on Windows, you can get how to setup the basic developmennt environment
[编辑] 4.2 Upload
[编辑] 4.2.1 Serial
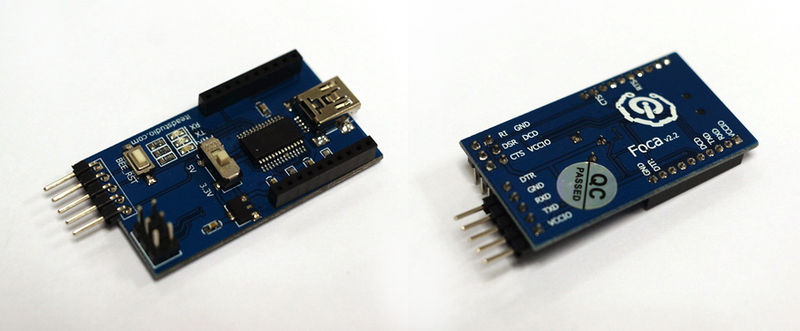
Prepare a USB2UART board, something like FT232RL or CP2102/CP2104:
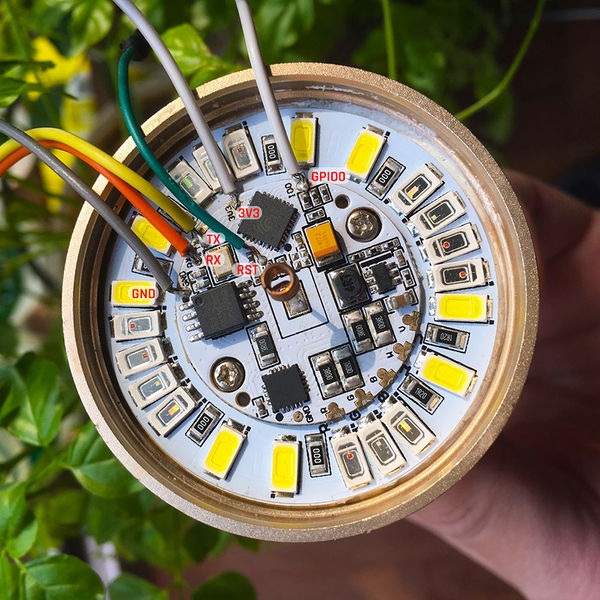
Upload firmware throught serial for OpenLight Bulb:
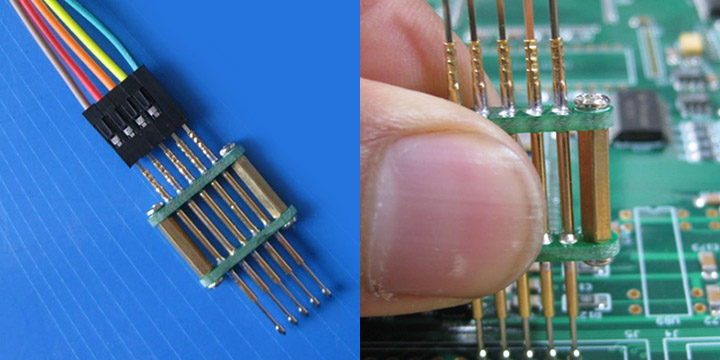
Upload firmware throught serial for OpenLight Controller:
- USB2UART_GND ------> SmartNode_GPIO0 / Bulb_GPIO0
- USB2UAR_GND -----> SmartNode_GND / Bulb_GND
- USB2UAR_RXD -----> SmartNode_TX / Bulb_TX
- USB2UAR_TXD -----> SmartNode_RX / Bulb_TX
Connect USB2UAR_VCC3.3 -----> SmartNode_VCC / Bulb_3V3 at last
ESP8285 will be enter upload mode, we can upload the compiled firmware through serial using following commands in Linux:
$ cd /path/to/noduino-sdk/sketch/open-light
$ make produce ESPPORT=/dev/ttyUSB1
In windows:
$ make produce ESPPORT=COM7
COM7 is your USB2UART device
In MAC OS, maybe it's:
$ make produce ESPPORT=/dev/cu.SLAB_USBtoUART
/dev/cu.SLAB_USBtoUART is your USB2UART device
[编辑] 4.2.2 Online
- Login
- Username: noduino
- password: noduino1234
Click the "Add files", select the user1.bin and user2.bin located in /path/to/noduino-sdk/sketch/open-light/build/
Then click "Start upload" to upload the user1.bin and user2.bin into the server temporaily
[编辑] 5 Hardware
[编辑] 5.1 LED
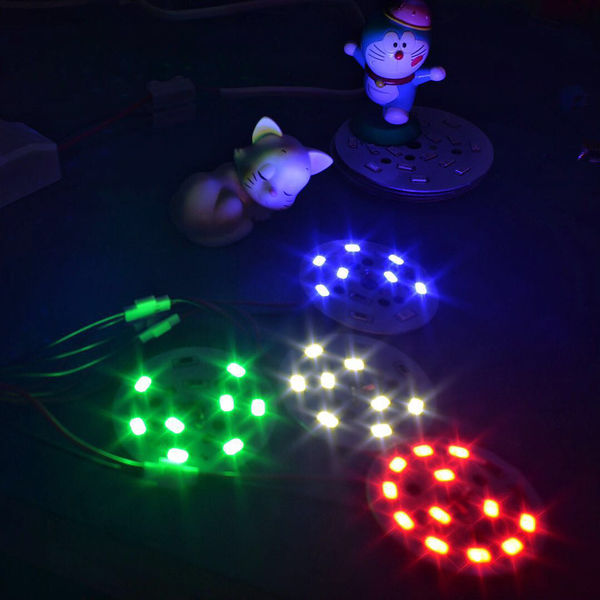
OpenLight 铝基板上,LED 灯珠默认布局为:
- Red LED 6 颗串联,正极接 12V,负极接控制板 R (MY9291 之 OUTA)
- Green LED 4 颗串联,正极接 12V,负极接控制板 G (MY9291 之 OUTB)
- Blue LED 4 颗串联,正极接 12V,负极接控制板 B (MY9291 之 OUTC)
- White LED x8 (4 颗串联为一组, 2 组并联,正极接 12V,负极接控制板 W (MY9291 之 OUTC))
LED 灯珠 (5730) 单颗特性为:
- 尺寸 5.7 x 3.0 mm
- 最大电流 150mA (0.5W)
- VF 为 3.0 - 3.4V (Red LED为 2.0 - 2.2V)
- 亮度 50 - 55 lm
LED 灯珠其实就是一个二极管,只要有一个正向导通电压 (VF) 就能发光,一般为 2 - 3.5V,低于此电压灯珠不能发光,高于此电压,灯珠会烧坏。
控制灯珠亮度的,是电流大小,因此调光灯实际调得是电流的大小。电流超过额定电流,会加速灯珠老化,缩短灯珠寿命
[编辑] 5.2 MY9291
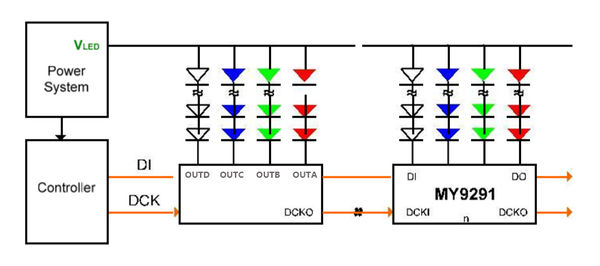
OpenLight 采用台湾明阳 4 通道恒流 LED 驱动芯片,控制 R, G, B, W 四路 LED 灯珠
- Feature:
- 3.3 - 5V 电源电压范围(±10%)
- 每个通道 5 - 350 mA 恒流输出范围
- 可承受最大输出电压 24V,支持多颗 LED 串联
- 外接器件少,仅需四个外接电组来设定四組恆流电流
- Block Diagrame:
电源为恒压源,可以多片级联,MCU 的控制线就两个:DI 和 DCK
- 电源电压与灯珠串并联确定:
- 12V 电源的情形,如选用 VF 为 3V 左右的 LED 灯珠,则需要 4 颗串联,这样每颗灯珠分到电压为 3V 左右;2V 左右的灯珠,则需要 6 颗串联
- 24V 电源,则 3V 灯珠 8 颗串联,2V 灯珠 12 颗串联
- 6V 电源,则 3V 灯珠 2 颗串联,2V 灯珠 3 颗串联
- 输出限流
MY9291 单路最大输出 350mA,为节约灯珠寿命,可限制通过灯珠的最大电流以节约灯珠寿命
最大输出电流限制:
R = 380mV / Iout
满输出 350mA,则每路的限流电阻都得选为:1R,1/4 W 够用
OpenLight 球泡灯,R/G/B 选用电阻 4R7,限流为 81mA 左右,W 用两个 4R7 并联 2.35R 左右,限流为 162mA 左右。这样基本限制经过每颗 5730 (0.5W) 灯珠的电流为 80mA 左右,以延迟灯珠老化。这样整体功率被限制在 5W,如要增加亮度,可将这 5 个 4R7 电阻替换为 3R0,可将输出功率增加到 7W
[编辑] 6 Power
[编辑] 6.1 12V
220V 转 12V 恒压电源模块,额定 12W,1A 电流输出
[编辑] 6.2 3.3V
ESP8266/ESP8285 chip、MY9291/MY9231 chip、SPI Flash chip are all 3.3V power.
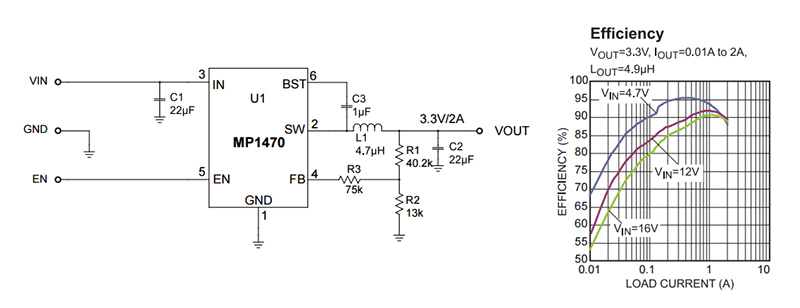
[编辑] 6.2.1 MP1470
- Wide 4.7V to 16V Operating Input Range
- Fixed 500kHz Switching Frequency
- Over-Current Protection and Hiccup
- Thermal Shutdown
- Output Adjustable from 0.8V
- Available in a 6-pin TSOT-23 package
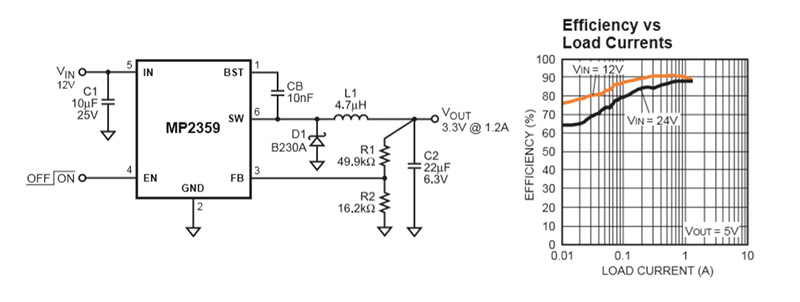
[编辑] 6.2.2 MP2359
- Wide 4.5V to 24V Operating Input Range
- 1.2A Peak Output Current
- 0.35Ω Internal Power MOSFET Switch
- Stable with Low ESR Output Ceramic Capacitors
- Up to 92% Efficiency
- 0.1μA Shutdown Mode
- Fixed 1.4MHz Frequency
- Thermal Shutdown
- Cycle-by-Cycle Over Current Protection
- Output Adjustable from 0.81V to 15V
