ESP8266
目录 |
1 概述
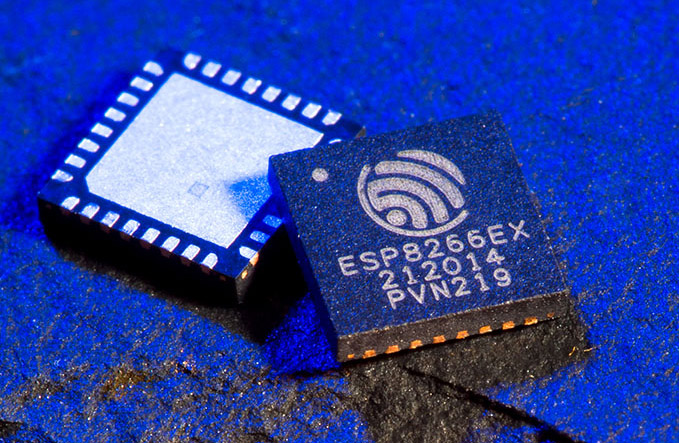
ESP8266 是一个带完整 WiFi 功能、 同时带一个 32bit MCU 的 SoC,可以取代原 Arduino 核心板 + WiFi 扩展板完成的大部分应用
最重要的,他的价格,只有 RMB 10 块左右
带 1MB Flash 的模块价格,也只在 RMB 13 块左右,批量的价格更便宜
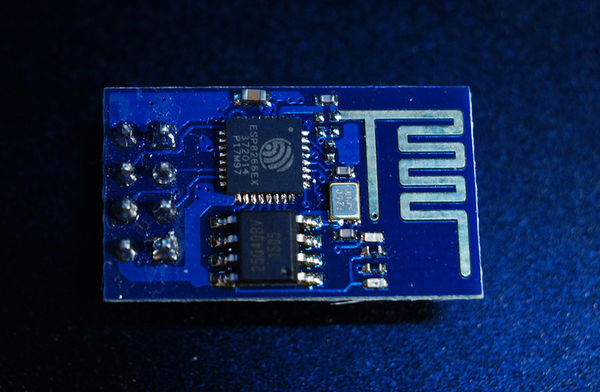
下图是一个典型的、可独立运行的模块,外部元器件 10 个以内(实际 7 个外围元器件就行):
ESP8266 的芯片详细特性,参考此页:ESP8266 特性
1.1 总体结构
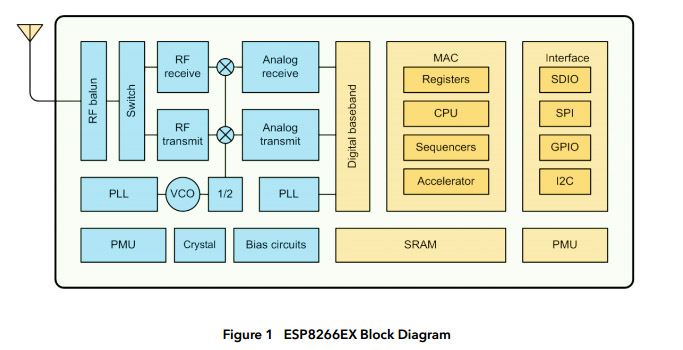
ESP8266EX 集成:天线开关,RF balun,功率放大器,低噪放大器,过滤器,电源管理模块,32 位 MCU
仅需 7 个外围器件,就是一个完整的带 32bit MCU、完整 WiFi 功能的 SoC
ESP8266 结构框图:
内部 CPU (MCU) 使用 Tensilica’s L106 钻石系列32位内核处理器,带片上 SRAM
1.2 MCU 结构
- Tensilica Xtensa L106 Diamond series (an enhanced version)
- Only 20% of MIPS has been occupied by the WiFi stack, the rest can all be used for user application programming and development
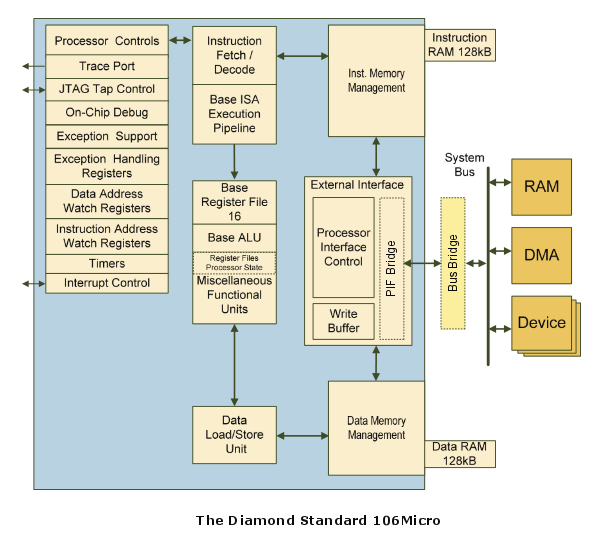
MCU Core 的框图:
- Small, low power 32-bit RISC controller core, Xtensa ISA
- Cache-less processor with memory protection unit
- 5-stage pipeline
- Dhrystone 2.1: 1.22 DMIPS/MHz
- 24/16-bit ISA with modeless switching
- Iterative 32x32 multiplier
- Separate instruction and data memory interfaces
- Integrated interrupt controller with 15 interrupts at 2 priority levels
- 32-bit ALU
- 16 GPRs
Xtensa L106 Architecture Xtensa L106 体系结构精要
1.3 SoC 内部存储
ESP8266EX WiFi SoC is embedded with memory controller, including SRAM and ROM. MCU can visit the memory units through iBus, dBus, and AHB interfaces.
According to our current version of SDK provided, SRAM space that is available to users is assigned as below:
- RAM size is around 50 KB, that is to say, when ESP8266EX is working under the station mode (WiFi) and is connected to the router, programmable space accessible to user in heap and data section is around 50 KB
- There is no programmable ROM in the SoC, therefore, user program must be stored in an external SPI flash
用户外部程序都存储在外部 SPI flash 上,启动时,SoC 自动加载
- 还有,除了外部 BOM 少,硬件易实现易测试外,对开发者最友好的,牛逼的,是其天生带串口刷机功能。。。片子出厂时就有串口刷机功能。。。
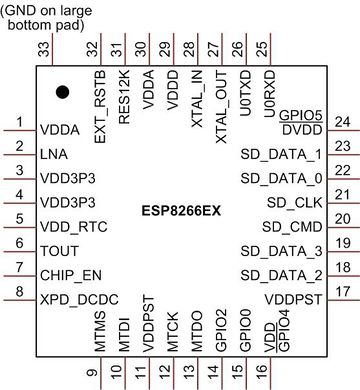
1.4 管脚定义
- PIN6 --- TOUT / ADC
- PIN8 --- GPIO16 / Deep-Sleep Wakeup
- PIN9 --- GPIO14 / HSPICLK
- PIN10 --- GPIO12 / HSPIQ
- PIN12 --- GPIO13 / HSPID
- PIN13 --- GPIO15 / HSPICS
- PIN14 --- GPIO2 / UART TX during flash programming
- PIN15 --- GPIO0 / SPICS2
- PIN16 --- GPIO4
- PIN24 --- GPIO5
- PIN25 --- GPIO3 / UART RX during flash programming / URXD
- PIN26 --- GPIO1 / SPICS1 / UTXD
2 开发板
ESP8266 外围只需晶振、电容、电阻等 7 个元器件,就能正常运行。为提供效率,快速、方便地使用,我们还是建议直接使用模块或者开发板
2.1 ESP8266 模块
ESP8266 模块,是在 ESP8266 芯片基础上,加上必要的晶振、电容、电阻、SPI Flash、WiFi 天线组成的一个最小 WiFi 系统
市面流行的模块,参考: ESP8266 Module
2.2 基于模块的最简系统
使用 ESP8266 和一个 USB 转串口板,亦可搭建一个精简开发环境,可以直接使用 Noduino (支持 esp8266 的 Arduino ),也可直接使用 Noduino-SDK,便宜又灵活
移步: ESP8266 最简系统
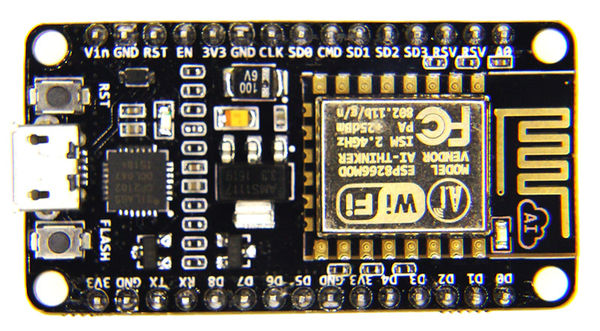
2.3 NodeMCU
市面在售体积小巧的开发版,可以直接使用 Noduino (支持 esp8266 的 Arduino ),也可直接使用 Noduino-SDK,方便、快捷、便宜
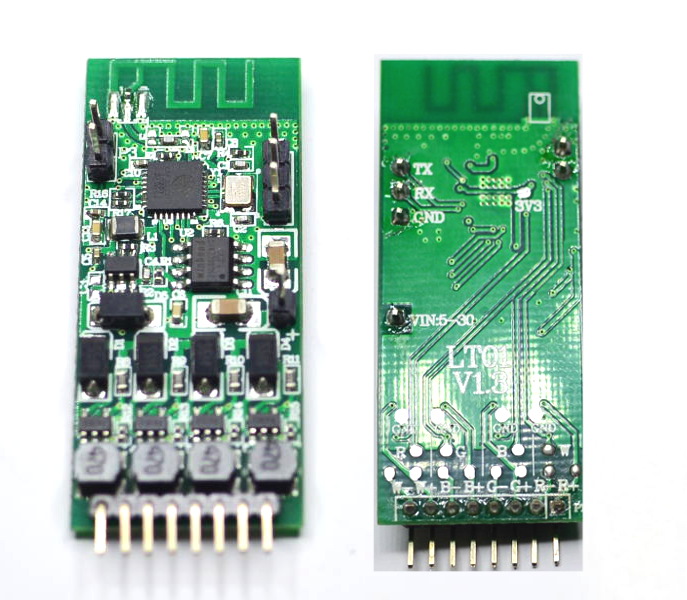
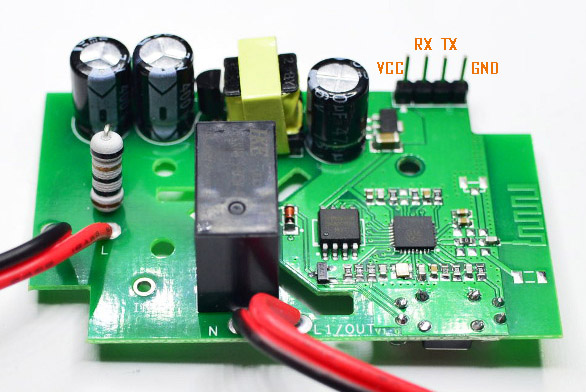
2.4 市售各种集成模块
市售如下两款集成模块,都预留了串口,可以使用 Noduino SDK 进行串口刷机:
带 4 路 PWM 的灯具调光模块:
带继电器的开关通断模块:
3 开发工具
学习、熟悉、快速成型建议从 Arduino 开发环境开始。
精确控制,产品化,建议使用我们的 SDK: espduino-sdk (专为智能硬件和物联网应用优化,无缝使用云服务)
3.1 Arduino
3.1.1 Quick Start
- Getting Started with Noduino on Windows (Arduino ESP8266 Extended)
- Getting Started with Noduino on Mac OS X (Arduino ESP8266 Extended)
- Getting Started with Noduino on Linux (Arduino ESP8266 Extended)
详细参考:ESP8266 Arduino
3.2 SDK
产品级开发,我们建议直接使用 SDK 开发,可以尝试 Noduino 社区的 SDK,基于乐鑫官方 SDK,并做了很多易用和专业改进:
https://github.com/icamgo/noduino-sdk
3.2.1 Quick Start
- Getting Started with Noduino SDK on Linux
- Getting Started with Noduino SDK on Mac OS X
- Getting Started with Noduino SDK on Windows
3.2.2 SDK 应用笔记
- ESP8266 Boot
- ESP8266 UART
- ESP8266 GPIO
- ESP8266 Sleep ESP8266 提供三种可配置的睡眠模式,实际根据应用的功耗要求选用
- ESP8266 Flash
- ESP8266 Module
- ESP8266 SmartConfig
- ESP8266 AirKiss NFF 微信 AirKiss 近场发现,简化智能设备生产过程
- ESP8266 ESP NOW
4 典型应用方案
- WiFi 智能插座
- WiFi 智能灯
- WiFi 智能门磁
- WiFi 低功耗传感器示例: https://github.com/EspressifSystems/low_power_voltage_measurement https://github.com/EspressifSystems/low_power_voltage_measurement/wiki
5 资源
- https://github.com/jcmvbkbc/gcc-xtensa
- https://github.com/esp8266/Arduino
- http://www.esp8266.com
- https://github.com/nodemcu
